The post Upside-down sticky banana cake appeared first on .
]]>This cake really needs to be eaten the day it’s made to look – and taste – at its most beautiful, glossy best, but I would hasten to say I’ve never found that to be a problem – the hardest thing is trying to keep everyone away long enough to let it cool down a little! However, in the interests of seeing whether it would keep, I managed to snaffle a slice when I made the one in the photo and refrigerated it overnight (with a big note on it threatening dire things to anyone who even thought about eating it!) I gently warmed it the next day and then of course had to eat it…in the interests of research you understand…and it was terrific; the bananas weren’t quite as glossy as when it’s freshly turned out, but the taste and texture were perfect.
Caramel Topping:
60g unsalted butter
3/4 cup brown sugar
Large pinch of salt
4-5 large #just ripe bananas
Cake:
180g self-raising flour
¼ teaspoon salt
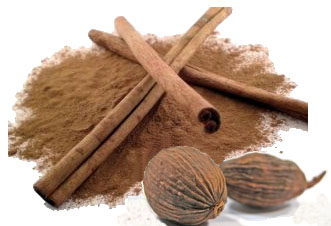
1/2 teaspoon cinnamon
1/4 teaspoon nutmeg
1 medium size very ripe banana
2 tablespoons sour cream
2 eggs
180g castor sugar
90g cultured unsalted butter, in small chunks, at room temperature
1 teaspoon vanilla extract
To serve: Golden syrup and rich cream or vanilla ice cream
# It’s important that the bananas for the caramel topping aren’t too ripe otherwise they collapse and become mushy as they bake, mind you the cake still tastes great, it just doesn’t look as pretty. This works in reverse for the banana that’s part of the cake batter, it’s best if it’s really ripe because it’s sweeter and mixes in more evenly.
Preheat your oven to 180C. Butter a 24-25cm round cake tin and set it aside.
For the caramel topping, melt the butter in a heavy-based saucepan over medium heat. Add the brown sugar and salt and cook the mixture, stirring it occasionally, for a few minutes until it’s glossy – don’t be alarmed if the sugar doesn’t dissolve completely, it tends to form a slush. Just be a little careful as you cook this – don’t let it cook for too long or get too hot as the butter will separate out, not that this is a major tragedy as you can still use the mixture, it’s just a bit more awkward to do so as the sugar hardens.
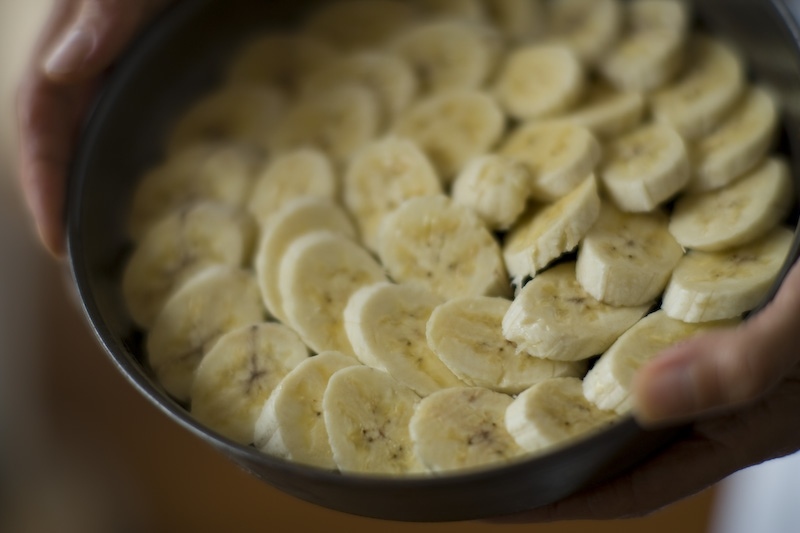
When the caramel is ready, pour it into the prepared tin and tilt it to coat the bottom evenly. (If the topping has separated a bit so the sugar has hardened, just press it in as best you can…it will melt again as the cake bakes.) Now, peel and slice the bananas fairly thickly (about 6-7mm) then sit the slices in overlapping circles over the base of the tins so they completely cover the caramel. Set the tin aside.
Put the flour, salt, cinnamon and nutmeg into a food processor and whiz them together for 10 seconds. Tip them into a bowl. In another bowl, mash the banana then stir in the sour cream. Set both bowls aside.
Put the eggs and sugar into the processor, then whiz them together for 1 minute, stopping and scraping down the sides with a rubber spatula occasionally. Add the butter and vanilla, and whiz again for 40 seconds or so. Now, scrape the mashed banana and sour cream mixture into this and whiz them together for 10 seconds or until they’re just combined. The batter may well look a little curdled at this stage, but don’t worry, it will be fine. Add the flour mixture to the food processor and pulse them together until they’re just combined.
Dollop spoonfuls of the cake batter into the tin, over the bananas and spread it out evenly. Do this fairly carefully so you don’t disturb the bananas underneath.
Bake for 45-50 minutes until the cake is golden and springy when you give it a gentle prod in the centre. Remove it from the oven and leave it to settle in the tin for three minutes. Then carefully loosen it around the sides (watch out for your fingers as the tin is very hot). Sit a serving plate on top of the tin and, holding it with a tea towel to protect your hands, flip the cake and plate over. Sit the plate on the bench and leave the tin on top for 20 seconds – this creates a little bit of steam which helps the cake come out of the tin easily. Gently remove the tin. Don’t worry if some banana slices stick to the bottom of it, just scrape them off and press them back onto the cake. Occasionally, I’ve found the caramel has hardened a little and some bits have stuck to the base of the tin – if this happens to you, very gently warm the base of the tin to dissolve the hardened caramel then drizzle it over the cake. Let the cake cool.
Just before serving, brush a little golden syrup over the top. It’s lovely served warm or room temperature with cream or ice cream. I’d have to say this cake is best eaten the day it’s made. Serves 6-8.
To find out more about Belinda Jeffery go to: belindajeffery
The post Upside-down sticky banana cake appeared first on .
]]>The post Asparagus, herb and goat’s cheese tarts appeared first on .
]]>This recipe is from my book, Utterly Delicious Simple Food, (Lantern, 2014), and I thought it was a lovely one at this time of year when local fresh asparagus is starting to appear in the markets.
Although it can seem that anything to do with pastry or tarts is inordinately time consuming, this isn’t necessarily the case, and these lovely tarts are a perfect example of what you can do with a few sheets of ready-rolled pastry. They’ve become a bit of a staple for me when I need something that feels and looks really special, but doesn’t take forever to make. I recently served them to friends for a light lunch along with a vibrant beetroot and pecan salad, and platter of ripe tomatoes, then finished off with a bowl of gently sweetened raspberries topped with a splodge of thick cream swirled with brown sugar and yoghurt. It was such a simple meal, yet everyone loved it and I had no-end of requests for the recipes.
If you can only find very thin spears of asparagus, which happened to me for the photograph, you will need to buy extra as each tart will take about 12 thinner spears.
Serves 4
2 sheets ready-rolled butter puff pastry
36 medium-sized spears green asparagus spears
2 tablespoons roasted pecans, sliced; tiny dill sprigs; and a little crumbled goat’s cheese, optional, to garnish
Goat’s cheese filling:
280g soft goat’s cheese marinated in olive oil and herbs (I use Meredith Dairy, which is terrific)
¼ cup finely chopped dill
2 tablespoons finely chopped tarragon
1 tablespoon finely chopped flat-leaf parsley
1 tablespoon finely snipped chives
Lemon dressing:
¼ cup (60ml) lemon-infused extra virgin olive oil (or use regular extra virgin)
3 teaspoons freshly squeezed lemon juice, or more to taste
½ teaspoon balsamic vinegar, or more to taste
¼ teaspoon caster sugar
½ teaspoon sea salt, or more to taste
Line a large baking tray with baking paper, and set it aside. (You can use two smaller trays if that works better for you.)
Using a ruler as a guide, cut each sheet of pastry in half, then trim each half into a neat rectangle measuring approximately 12cm x 18cm. Use the tip of a sharp knife to lightly score a 1cm border all the way around the edge of each rectangle, being careful not to cut right through the pastry. Sit the rectangles on the prepared tray, then use a fork to pierce the pastry within the scored borders at 2cm intervals. Pop the tray in the fridge for 15 minutes.
In the meantime, preheat your oven to 200C.
To make the goat’s cheese filling, scoop the goat’s cheese into a bowl, mash it to break it up, then thoroughly mix in the herbs.
For the lemon dressing, whisk all the dressing ingredients together in a bowl until the sugar and salt have dissolved, then taste it and adjust the flavours to suit you.
Bake the pastries for 10 – 12 minutes, or until they’re golden, then remove them from the oven and let them cool slightly on the baking tray, pressing down with the back of a spoon inside the border of each one to form a slight well.
While the pastry bases are cooking, trim the woody bases of the asparagus and peel them if you like. When they’re all done, slip the asparagus spears into a large frying pan of lightly salted, boiling water and adjust the heat so the water bubbles gently around them. Cook them for 3 – 5 minutes or until they’re tender but still lovely and green (you may have to do these in batches if your pan is small). As soon as they’re ready, remove them from the pan and dunk them briefly in cool water to stop them cooking, then wrap them in a thick tea towel.
Divide the goat’s cheese mixture among the pastry bases, spreading it evenly into the ‘wells’ in the pastry, then pop the tarts back into the oven for 3 minutes to heat through. Meanwhile, gently mix the asparagus with the dressing.
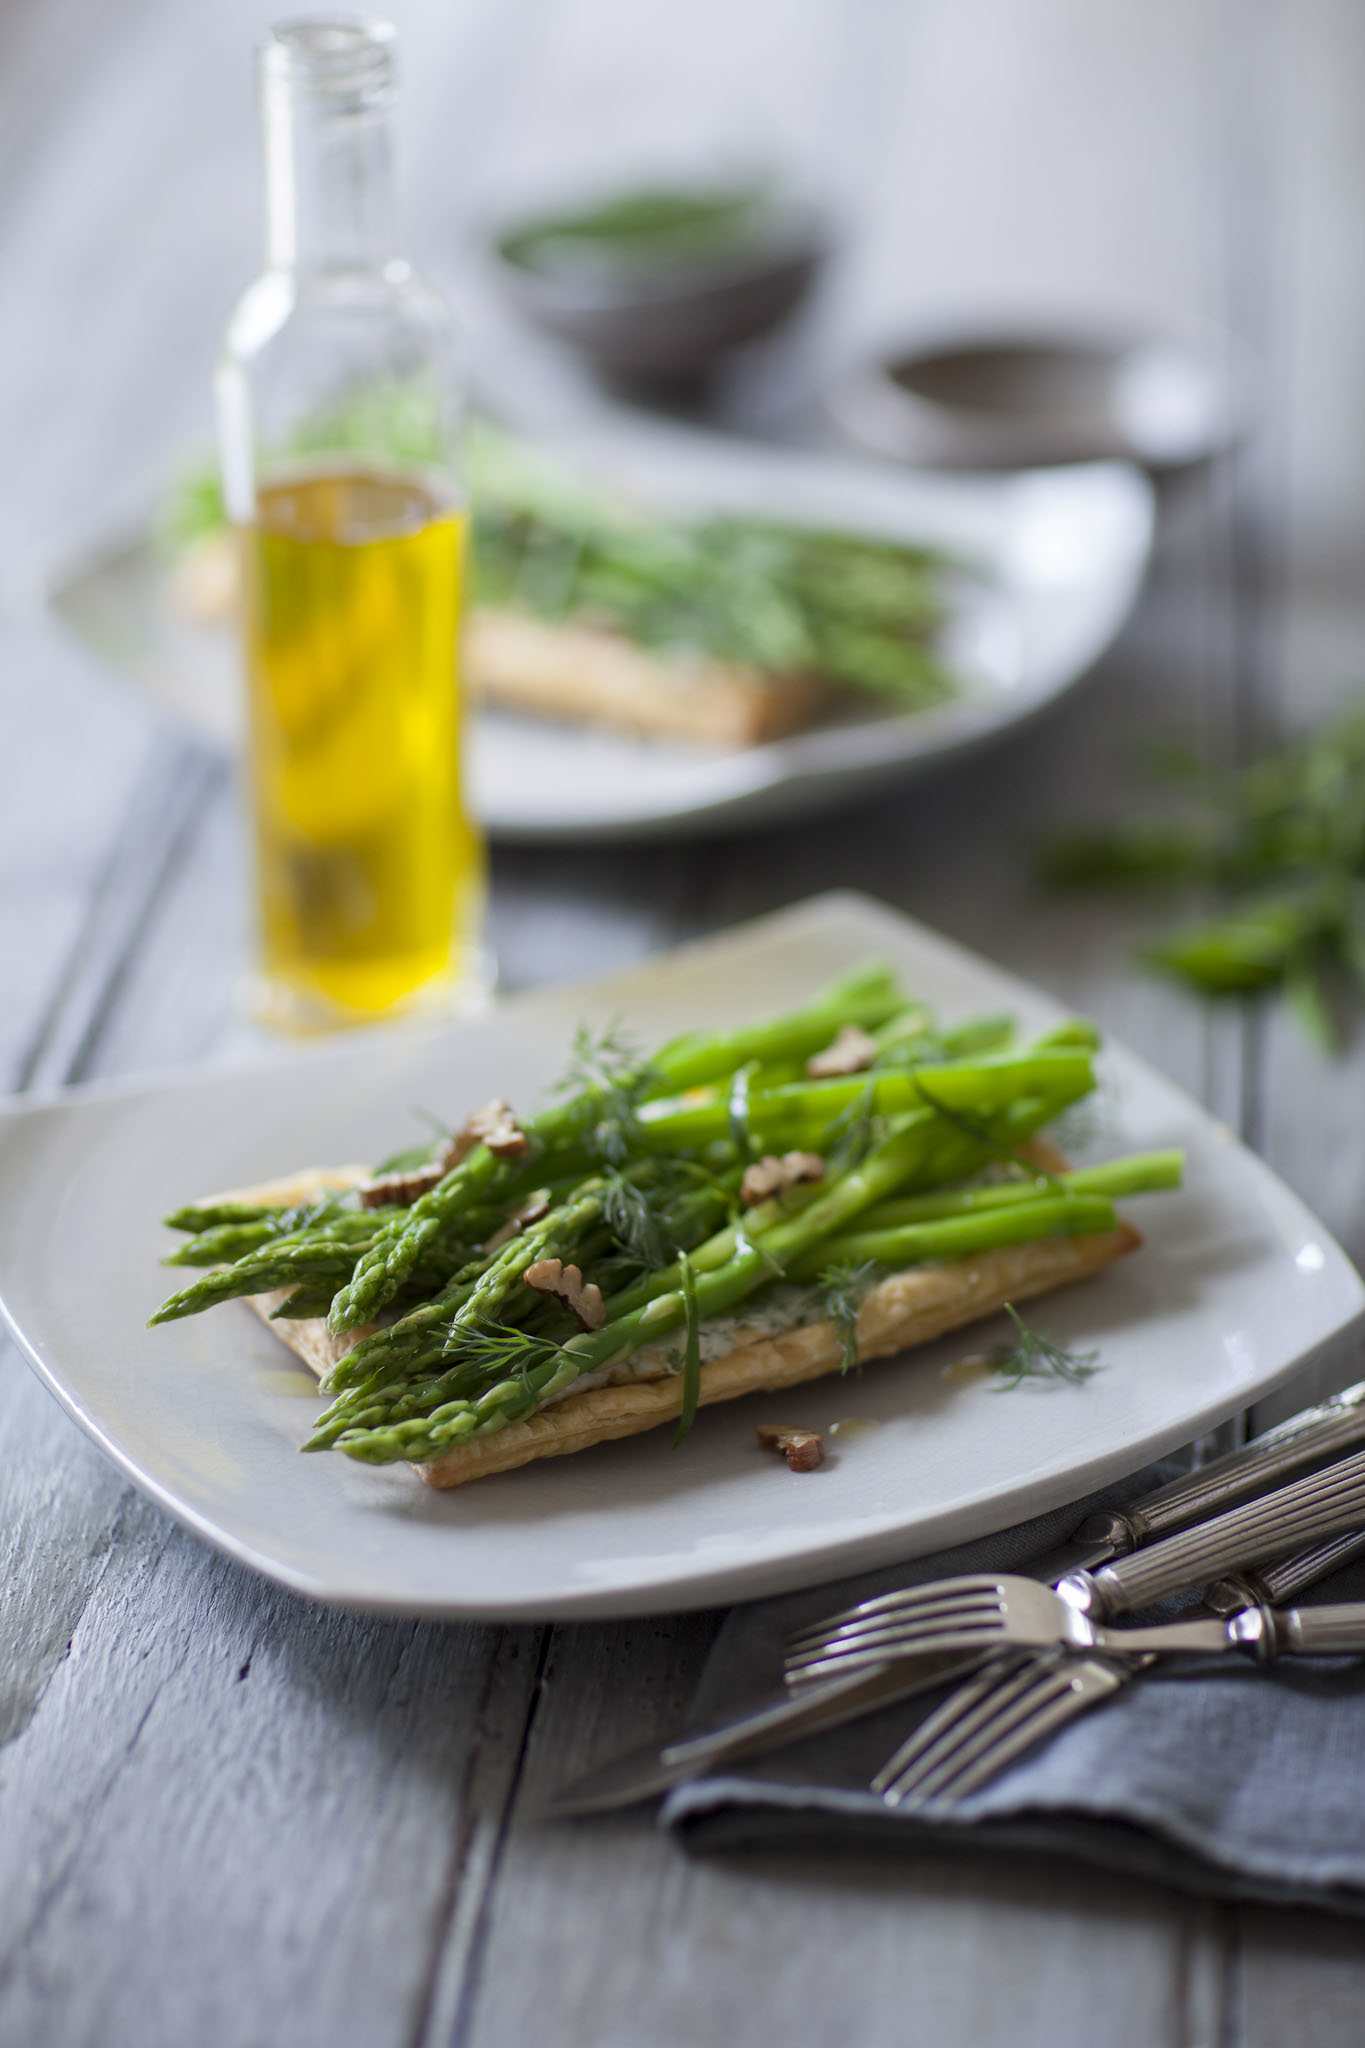
When the tarts are ready, slide one onto each plate and sit some asparagus spears, higgledy-piggledy, on top. Sprinkle with pecans, dill sprigs and the crumbled goat’s cheese, if using. Serve immediately.
Do aheads…
To make this dish even easier, you can cut the pastry bases, and make the goat’s cheese filling and asparagus dressing a day ahead and store them in the fridge.
To find out more about Belinda Jeffery go to: belindajeffery
Utterly Delicious Simple Food, (Lantern, 2014)
The post Asparagus, herb and goat’s cheese tarts appeared first on .
]]>The post Belinda Jeffery’s Last Minute Christmas Cake appeared first on .
]]>Last Minute Christmas Cake
Makes 1 large or 3 med/small cakes
Although I call this a Christmas cake, truth be known I whip it up regularly through the year as it’s my favourite cake of all – chock-a-block with fruit and fragrant with spices. I make a big cake for us, but I also bake smaller cakes like the one in the photograph, as gifts. For me there is nothing more special than giving or receiving something that is homemade, knowing all the care and love that has gone into creating it.
300g unsalted butter
420g dark brown sugar
1.2kg mixed #dried fruits (I use fruits such as raisins, pitted prunes and dates, sultanas, currants and lovely smoky sun-dried apricots)
2 teaspoons bicarbonate of soda
1 cup (250ml) dark rum, port or muscat
½ cup (125ml) water
½ cup (125ml) cognac
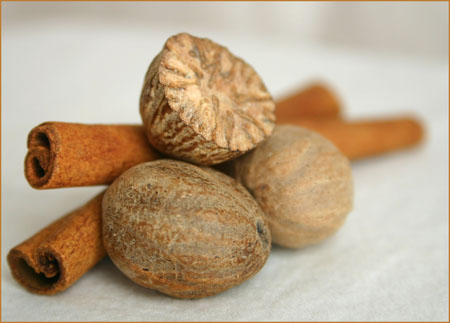
2 teaspoons freshly grated nutmeg
2 heaped teaspoons cinnamon
4 eggs, lightly beaten
2 ½ cups (400g) stone-ground wholemeal plain flour About 150g pecan halves and 120g whole blanched almonds, for decorating
Apricot glaze, optional (see below)
* As far as the dried fruit goes; I tend to use whatever happens to be in the pantry at the time – as long as the quantity is roughly the same the cake will be delicious.
Place the butter in a saucepan large enough to eventually hold all the cake ingredients and melt it over medium heat. Add the sugar and stir to partially dissolve it so it’s wet and slushy.
Meanwhile, slice any large pieces of dried fruit (such as the prunes and dates), into two or three pieces.
Now, tip all the dried fruit, the bicarbonate of soda, rum, port or muscat, water and cognac into the pan with the sugar mixture. Increase the heat to high and keep stirring until the sugar has dissolved. Once it has, stop stirring and bring the mixture to the boil, then reduce the heat and let it bubble gently for four minutes. You need to keep an eye on it and adjust the heat at this stage, as it froths up considerably because of the bicarbonate of soda. When it’s ready, turn off the heat and leave the mixture to cool in the pan. I often make this in the evening and leave it to cool overnight. However, if you do this cover it well – I once left the lid slightly askew and woke to find an army of very inebriated ants weaving their way to and from the pan!
Preheat your oven to 150C.
Butter a 23cm x 23cm x 8cm square cake tin (or three 13cm x 13cm x 8cm cake tins) and line the base and sides with a double thickness of buttered baking paper.
Add the nutmeg, cinnamon and eggs to the dried fruit mixture and stir them in well. Mix in the flour, then leave the batter to sit for a few minutes. Scrape it into the prepared tin/tins and give it a gentle shake to level the top
Now comes one of the most enjoyable things to do: decorating the top of the cake. I love doing this as you can create all sorts of different patterns by marching alternating bands of pecans and almonds across the top, curving them into waves, or creating smaller and smaller squares.
Bake the cake for 2 ¼ – 2 ½ hours (if you are baking smaller cakes, they will take approx. 1 hour and 40 minutes) until it feels firm-ish in the centre when lightly pressed and a fine skewer inserted in the middle comes out clean. After an hour or so, it’s a good idea to check the top; if it’s a good rich brown cover it loosely with a sheet of foil to stop it getting darker.
Leave the cake to cool completely in the tin on a rack, then remove it from the tin, wrap it tightly in cling wrap or foil, and store it in the fridge where it will keep well for up to three months.
Just before serving the cake, brush a little warm apricot glaze over the top, if using.
Apricot glaze (delicious and easy to make)
Boil about ½ cup of apricot jam or conserve with 1 ½ tablespoons of water for five minutes or so until the mixture becomes thick and syrupy (keep an eye on it and stir it regularly so it doesn’t catch and burn on the bottom of the pan). Pour it through a fine sieve into a bowl to remove any bits of apricot skin that may be in it, then brush the hot glaze over the cake and leave it to set.
To find out more about Belinda Jeffery go to: belindajeffery
The post Belinda Jeffery’s Last Minute Christmas Cake appeared first on .
]]>The post Speedy Summer Peach and Amaretti Tartlet appeared first on .
]]>These tartlets really are the most delicious things, and they’re remarkably quick and easy to make for such a gorgeous result. I have to admit that as soon as we’d taken this photo, Rodney, the photographer, and I sat down and demolished one each in an embarrassingly short time! I’d also have to say that if anything they’re even better served barely warm with a scoop of icy-cold vanilla ice cream. The two important things to remember when you’re making them is to use sweet, ripe peaches as otherwise they will taste a bit insipid, and to use butter puff pastry.
If you would like to get these ready well ahead of time, the night before you can cut out the tartlet bases, put them on the oven tray, cover them lightly and chill them. You can also make the amaretti crumbs and store them in an airtight jar. You need then only prepare the peaches and you’ll have them in the oven in no time.
Serves 4
2 sheets ready-rolled butter puff pastry
4 medium-sized sweet, ripe (but not squishy) yellow peaches
1/3 cup (75g) caster sugar
½ – 1 teaspoon vanilla extract
About 1/3 cup (110g) apricot jam, warmed so it’s runny, then strained
Icing sugar, for dusting
Vanilla ice cream or rich cream, to serve
Amaretti crumbs:
60g amaretti biscuits
3 teaspoons caster sugar
½ teaspoon cinnamon
1 tablespoon plain flour
Line a shallow baking tray with baking paper and set it aside.
For the amaretti crumbs, pop the amaretti biscuits into a thick plastic bag (a snap lock bag is ideal), seal it tightly, then finely crush the biscuits with a rolling pin. Tip them into a bowl; thoroughly mix in the caster sugar, cinnamon and flour, and set the mixture aside.
With a ruler as a guide, cut each sheet of pastry in half, then trim each half into a neat rectangle measuring approximately 9cm x 16cm. Use the tip of a sharp knife to lightly score a border, about 8mm wide, all the way around the edge of each rectangle, being careful not to cut right through. Sit the rectangles on the prepared oven tray and pop them in the fridge for 15 minutes.
In the meantime, preheat your oven to 200C.
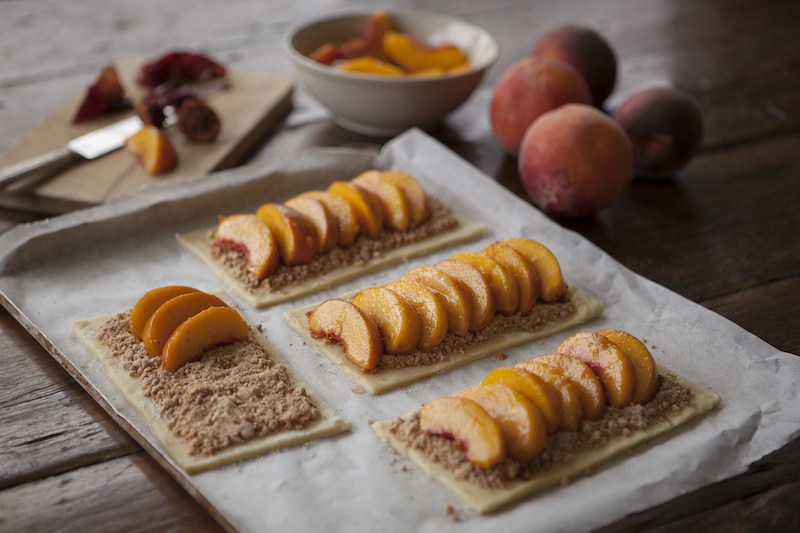
Peaches ready to go…Photo: Rodney Weidland.
Halve the peaches, and carefully peel away the skins before slicing them into thickish wedges. (I usually pull away a little skin before I halve the peaches to see how easily they peel. If the skin clings stubbornly to the flesh, you’re best to dunk the whole peaches in boiling water for 20 seconds or so, then quickly drop them into a bowl of cold water. Now try peeling them and the skins should pull away easily.)
Scoop the peach slices into a bowl and sprinkle the caster sugar on top. Drizzle in the vanilla and using your hands, gently mix them all together. (I find hands are best for this, as a spoon tends to make little gouges in the slices.)
Sprinkle 2 tablespoons of the amaretti crumb mixture into the centre of each rectangle and spread it out evenly, being careful to keep it within the scored border. Now sit a fairly tightly overlapping row of peach slices down the length of each rectangle, again keeping them within the border. There will be some sugary peach juices left in the bowl, so drizzle the peaches with these, being careful not to get the juice onto the border as it may burn, or dribble down the sides and stick the pastry layers together so they don’t rise properly.
Pop the tray in the oven and bake the tartlets for about 20 minutes until the pastry is crisp and the peaches tender.
Brush the tartlets (including the pastry border) with some of the warm apricot jam then run them briefly under a medium/hot overhead grill for about 1 minute or until the edges of the peaches and pastry start to caramelise and darken (they may be some very dark bits but don’t worry, they taste delicious.) Watch them like a hawk as they can burn quite easily, and as soon as they’re ready, whisk them out from under the grill, dust them with icing sugar and leave them to cool a little – they’re lovely served warm or at room temperature. (If the tartlets are a good colour when they come out of the oven, there’s no need to grill them. Simply brush the peach slices with the jam, leave them a few minutes then dust the tartlets with icing sugar.)
To serve, simply sit a tartlet on each plate, dust it with a wee bit more icing sugar if necessary, and serve it with a scoop of vanilla ice cream or cream.
For more information on Belinda Jeffery’s recipes go to: belindajeffery
The post Speedy Summer Peach and Amaretti Tartlet appeared first on .
]]>The post Learn the magic of Moroccan food at an Open Table workshop appeared first on .
]]>The workshop takes a journey through the creation of an authentic Moroccan banquet, learning how to approach this wonderful geography of cuisine. The banquet will include dishes for daily use and also for special occasions.
Says Ronit: “From the basics of spice selection and combination and the fundamental condiments essential to this type of cooking, to substantial key pieces for our table we will create a selection of dishes such as Vegetable Couscous, Lamb Tagine and a variety of cold and warm salads. We will also discuss condiments, such as marinated olives, chutneys and preserved lemon, and their complimentary dishes. The delectable sweet selection will include something like sweet briouates – filo cigars with almond paste and nut filling, showered with rosewater or orange blossom syrup.”
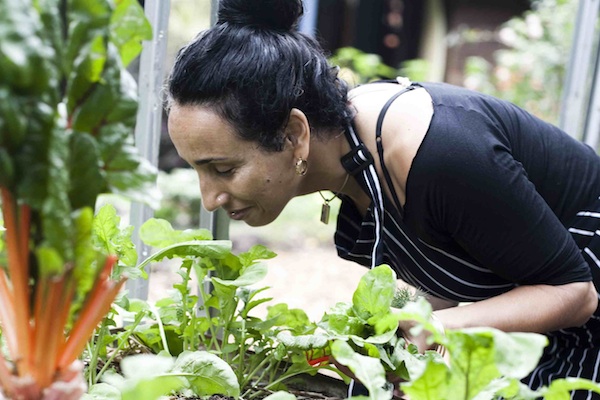
Ronit Robbaz-Franco in her Myocum garden.
The day ends with a feast from the banquet table, full of the foods everybody has cooked.
WHERE?
Open Table Lot 19 Lagoon Drive Myocum, NSW 2482 Classes are held in our fully equipped commercial Myocum kitchen. We are able to accommodate up to 10 people, which makes this a fantastic opportunity for groups of friends or colleagues.
COST
Workshops cost $130 GST included per class; A 50% deposit is required 10 days prior to the class to secure your place. This is transferable but non-refundable.
BOOKINGS
Please call Ronit on 02 66843 013 e-mail – [email protected]
![Quinoa+ Zucchini Flowers salad[1]](https://www.verandahmagazine.com.au/wp-content/uploads/2015/11/Quinoa-Zucchini-Flowers-salad1-e1446632931953.jpg)
Contact Ronit at Open Table on: opentable
The post Learn the magic of Moroccan food at an Open Table workshop appeared first on .
]]>The post Peas, mint and potato – plus a little extra punch appeared first on .
]]>My lovely neighbour and very good cook, Diane Hart, gave me the idea for this salad saying it was one she had been making for years, and that her now-adult children still love it and often cajole her into making it when they visit.
I can well understand why, as I adore peas, mint and potato together – it’s such a brilliant and time-honoured combination – but I also wondered how a little ‘bite’ from some chives and a sprinkle of crisp, salty bacon (I do so love bacon and peas) would go in it – and as it turns out, they go very well indeed!
Potato, Pea and Bacon Salad (serves 8-10)
1.3kg waxy potatoes, scrubbed
350g frozen (or fresh, in season) peas
½ cup sour cream
½ cup good quality mayonnaise
1/3 cup tightly-packed mint leaves
1-2 tablespoons snipped chives/sliced shallots – to try and check
Sea salt crystals, to taste
2 large rashers bacon, rinds removed and bacon diced
Small mint leaves, to garnish
Cook the potatoes whichever way you like, until they’re just tender when pierced with a fine skewer. (I usually leave the skins on and steam them whole, however if I’m short on time, I’ll peel , halve and quarter them before cooking, so they cook and cool faster, and just need chopping into chunks). Drain them and leave them to cool a little, then peel off the skins and let them cool completely. Finally cut them into bite-sized chunks and scoop them into a large bowl.
While the potatoes are cooking, steam the peas in another saucepan for about 3 minutes or until they’re just tender and bright-green. Drain them, then immediately dunk them into a bowl of ice and water to stop them cooking and set the colour. Drain the peas well in a sieve.
Tip the most of the peas into a blender (or food processor fitted with the steel blade), reserving a handful to scatter over the top of the salad. Dollop in the sour cream and mayonnaise, then add the mint leaves, chives and salt. Blend them together to form a gloriously gloopy, vivid green puree. Taste it, and add a bit more of any of the ingredients you think it needs.
Pour the pea puree over the potatoes, and using your hands (I slip on prep gloves for this as it’s pretty messy) gently mix the two together, then pile the mixture into a serving bowl.
Shortly before serving the salad, cook the diced bacon in a small frying pan over medium heat until it’s done to your liking. When the pieces are ready, scoop them out of the pan onto brown paper (or paper towel) to drain.
Finally, scatter the reserved peas, bacon and mint leaves over the top of the salad, and serve.
For more information on Belinda Jeffery’s recipes go to: belindajeffery
The post Peas, mint and potato – plus a little extra punch appeared first on .
]]>The post Winter warmer – chicken with slow-cooked onions and lemons appeared first on .
]]>Chicken with slow-cooked onions and lemons – this comforting dish is a mainstay for me when I want something delicious to eat that doesn’t require much work. If I’m making it for dinner, I tend to cook it in stages – caramelising the onions and garlic a few hours ahead of time, and spreading them into the roasting tin; then browning the chicken pieces just before I’m ready to put the whole lot in the oven. By the way, the preserved lemon isn’t essential in this dish, however if you do have some on hand, give it a try as it adds a tremendous depth of flavour to the chicken.
1/3 cup (80ml) extra-virgin olive oil
4 large brown onions, halved and sliced thinly
4 large cloves garlic, finely sliced
Sea salt and freshly ground black pepper, to taste
1 generous tablespoon thyme leaves
8 very small thyme sprigs
8 chicken chops (partly boned leg and thigh portions)
Flour, for dredging
1 ½ cups (375ml) chicken stock
1 ½-2 tablespoons finely chopped preserved lemon rind, optional
3 large lemons, scrubbed and dried
24 green olives (bright-green Sicilian olives are particularly good)
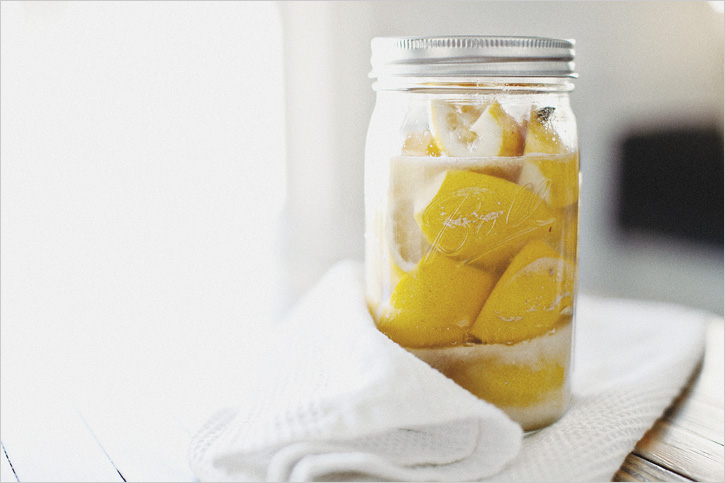
Preserved lemons add a depth of flavour.
Warm half the oil in a large frying pan over low heat. Add the onion and garlic and cook, stirring regularly, for20-25 minutes or until they’re soft and pale-golden. Season the mixture with salt and pepper, then stir in the thyme leaves. Spread this onion mixture evenly over the base of a roasting tin that will fit the chicken pieces snugly in a single layer. Sprinkle the thyme sprigs over the top and set the tin aside (you can do this step up to 6 hours ahead of time and keep the tin in a cool spot.) Wipe out the frying pan and set it aside too.
Preheat your oven to 180C. Heat the remaining oil in the frying pan over medium heat. Coat the chicken chops in flour, shaking off any excess then add them to the pan and cook them for 3 – 4 minutes each side until they are a rich golden-brown all over. Try not to crowd the pan or the chicken pieces will sweat rather than brown – it’s best to cook them in batches if they look a bit too snug, adding a little more oil if necessary. As the chicken chops are ready, sit them on top of the onion mixture.
Once the chicken has been browned, use paper towels to blot up any excess oil in the pan, then pour in the stock. Bring it to just below the boil, stirring regularly to scrape up any of the caramelised bits that have stuck to the pan. Add the preserved lemon rind, if using.
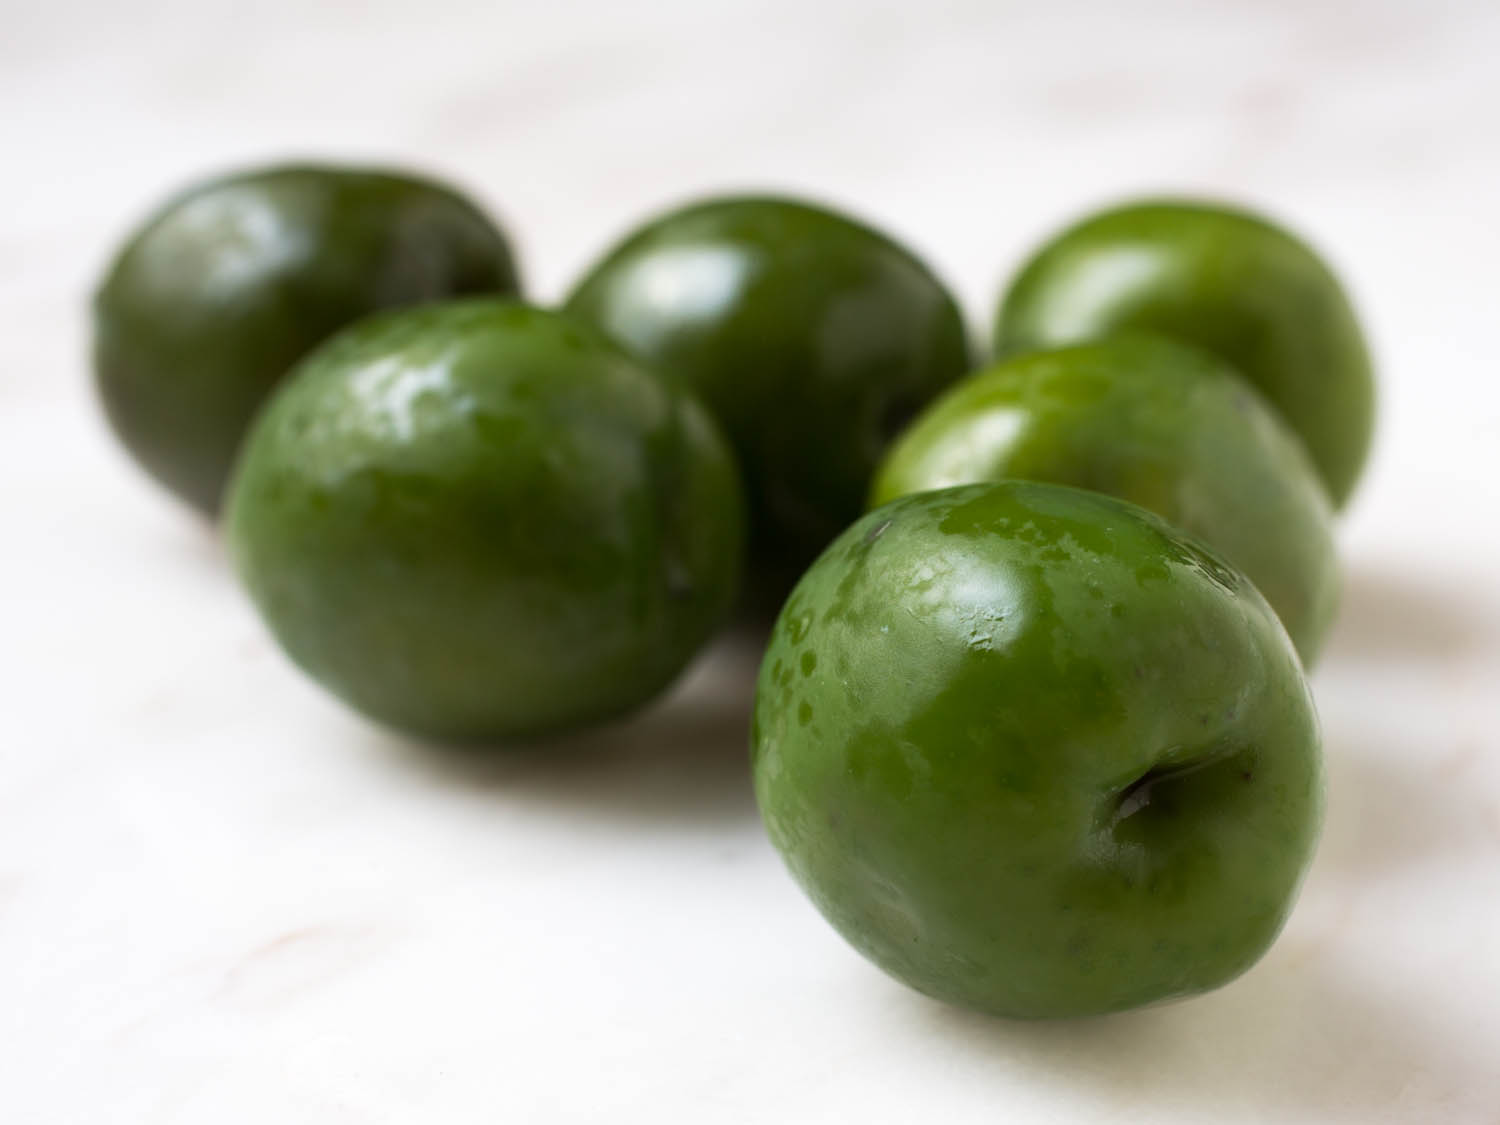
Green Sicilian olives are perfect for this dish.
Meanwhile, with a very sharp knife cut 16 thin slices of lemon. Remove the seeds, and overlap two slices on each piece of chicken. Squeeze the juice from the remaining lemons and add it to the frying pan, then pour this lemony stock into the tin around the chicken.
Put the tin in the oven, and cook the chicken for 45-50 minutes until it is deeply browned. Scatter the olives around the chicken for the last 15 minutes of cooking time.
When it’s ready, remove the tin from the oven and let the chicken settle for 5 minutes. Then carefully transfer the chicken, onion and cooking juices to a warm deep serving platter. It’s delicious with wilted spinach and soft polenta or olive oil mashed potatoes to soak up the cooking juices. (Serves 4-8, depending on how hungry everyone is.)
Check out more of Belinda’s recipes on: belindajeffery
The post Winter warmer – chicken with slow-cooked onions and lemons appeared first on .
]]>The post Belinda Jeffery’s Easter treat for grown-ups appeared first on .
]]>If you want to produce a mouth-watering dessert for Easter, try making this deliciously moist flourless almond, apple and chocolate cake, writes Belinda Jeffery.
This lovely cake is a firm favourite of mine. It’s light, but richly chocolatey and very moist. I love that the recipe has no additional sugar other than that in the chocolate and apple, and that it’s dairy and wheat-free. Although I hasten to add that for the photograph I glazed the cake with ganache, which is made with butter; however, I’m just as likely to serve it with a dusting of icing sugar and couple of spoonsful of berries. The original recipe for the cake came from Dov Soconi, an exceptionally talented chef and restaurateur, and although I’ve fiddled about with it, all credit should go to him.
4 eggs, separated
120g caster sugar
120g good-quality dark chocolate, melted and cooled to room temperature
120g almond meal
1 medium-sized (approx. 170g) sweet apple (pink lady, gala or fuji, are ideal), cored and coarsely grated
1 ½ teaspoons vanilla extract
Pinch of salt
Ganache, optional:
125g good-quality dark chocolate, in small chunks
60g unsalted butter, in chunks
Almond praline, for sprinkling, optional (recipe follows)
Softly whipped cream, for serving, optional
Preheat your oven to 170C. Lightly butter a 20cm round cake tin, line the base with buttered baking paper, dust it lightly with wheat-free cornflour or plain flour, and set it aside. (The tin I used for the cake in the photograph has a lovely fluted pattern embossed on the base, and is just a bit larger – 21 cm x 5 cm.)
Put the egg yolks and caster sugar into a medium-sized bowl, and beat them with a hand-held electric mixer for about 5 minutes, until they’re pale, thick and creamy-looking (you can do this in a stand mixer, if you prefer.)
Scrape the cooled chocolate into the yolk mixture, along with the almond meal, apple, and vanilla, and gently mix them all together.
In a clean, dry bowl, with clean, dry beaters, whip the egg whites and salt on medium speed just until they hold soft peaks. Quickly stir a third of the whites into the chocolate mixture to lighten it, then gently fold in the remaining whites in two batches. Scrape the batter into the prepared tin, shaking it gently to level it out.
Pop the tin in the oven, and bake the cake for about 40 minutes, or until the centre feels slightly springy when gently pressed. Transfer the cake to a cooling rack, leave it in the tin for 5 minutes, then carefully invert the cake onto the rack, remove the tin and paper, and leave it to cool completely.

Ganache: chocolate, butter and cool water
While the cake is cooling, make the ganache. To do this, put the chocolate, butter and 25ml cool water into a small, heavy-based saucepan over low heat. Let the chocolate and butter melt, stirring them regularly, until the ganache is smooth. (I use a small, flat sauce whisk for this, as it gets right into the corners of the pan, where the chocolate tends to clump a bit.) The most important thing to keep in mind is not to let the ganache get too hot and boil; if it does, it becomes oily and grainy and there’s not much chance of salvaging it. Once it’s silky smooth, take it off the heat and leave it to cool until it’s barely warm and a thick pouring consistency.
Once the cake is cool, pour the ganache evenly over the top so it trickles down the sides. I don’t cover the sides completely as I like the look of the rivulets of chocolate running down them. Leave the ganache to set. If the weather is warm and the ganache won’t set firmly, put the cake, uncovered, in the fridge for a short time so the quick burst of chilled air sets it (it can also dull the sheen if it’s in too long so you need to keep an eye on it.)
If you’re using the praline, just before serving the cake, remove some shards from the freezer and coarsely crush or chop them. Sprinkle it over the ganache, then serve the cake as is, or with softly whipped cream.
Makes 1 slim cake (serves 8)
P.S. Store any leftover cake in the fridge. To do this, put the cake, uncovered, in the fridge until the ganache is quite firm, then cover it in plastic wrap. Before serving, remove the wrap and return the cake to cool room temperature so the ganache regains its sheen.
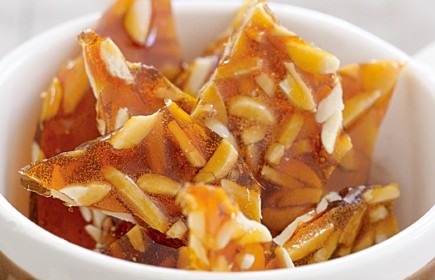
Almond praline
ALMOND PRALINE
You won’t actually need the full quantity of praline in this recipe, however as it’s fiddly to make smaller amounts, I always do the lot and store it in the freezer where it keeps beautifully for months ready to add it’s sparkle to all sorts of other puddings and cakes.
1 cup (220g) caster sugar
½ cup (125 ml) cold water
60g flaked almonds
Line a shallow baking tray with baking paper and sit it on a board or thick tea towel.
To make the praline, put the sugar and water into a small saucepan over medium heat. Stir constantly until the sugar dissolves, then stop stirring, increase the heat and bring the mixture to the boil. Boil it undisturbed, washing down the sides occasionally with a brush dipped in water to dissolve any sugar crystals. The mixture will slowly change from being liquid to syrupy, with lots of lazy bubbles breaking all over the surface.
From here on in you need to watch it like a hawk as it changes colour quite rapidly. As soon as it turns light amber, add the almonds and swirl the pan to mix them in (be careful as it may froth a bit at first). Continue to cook until it’s deep golden brown, then immediately take the pan off the heat and carefully pour the mixture onto the prepared baking tray. Using an oven mitt to protect your hands, tilt the tray gently to help spread the mixture even further. (Be careful doing this, as both the praline and tray are very hot.) Leave the praline to cool and harden, then break it into shards.
To store the shards, layer them in an airtight container between sheets of baking paper or freezer wrap to stop them sticking together. Pop them in the freezer until you need them. The praline shards can be used as is, broken into smaller pieces, or crushed.
For more of Belinda Jeffery’s recipes go to: belindajeffery
The post Belinda Jeffery’s Easter treat for grown-ups appeared first on .
]]>The post Janella’s journey appeared first on .
]]>Sometimes, when you live in the Northern Rivers, particularly in the Byron Bay region, it seems as if everybody has come from ‘somewhere else’, but in nutritionist Janella Purcell’s case, it’s more that she’s travelled back to her roots, writes Candida Baker.
I’m sitting talking to Janella Purcell on the beautiful wide verandah of her Coorabell home, and the author of the recently published Janella’s Super Natural Foods, is in relaxed mode. She’s been in Sydney for a few weeks seeing clients, and the leaves have got a bit out of control, so she’s been sweeping the verandah of the house she moved to a little over three years ago.
“It was always a dream of mine to eat off the land,” she tells me. “I moved from Sydney and for me, the move back to this area was definitely about achieving a balance in my lifestyle – the kind I recommend to my clients!”
But for Purcell, the area perhaps had more calling than for others. “My mother was born in Casino,” she says. “I actually come from the first Lebanese family in Australia, and our tribe is scattered from Brisbane to Kyogle and beyond, so the idea of land was deeply ingrained in my psyche.”
Purcell, of course, is well-known to television audiences as the Good Chef, in Good Chef, Bad Chef. Her first book was the award-winning Janella Purcell’s Elixir, How To Use Food As Medicine was published in 2004, and her first recipe book, Eating for the Seasons in 2010, followed by the second edition of Elixir. Her first recipe book, Eating for the Seasons was published in 2011, follwed by Janella’s Wholefood Kitchen in 2012. In this latest book, Janella’s Super Natural Foods, she follows and the lead of her first two, taking us further down the path of understanding that food can be medicine for our bodies (and souls) as well as simply fuel.
“I’m not an evangelist however,” she says. “I think it’s very important to understand that families have time constraints and that it’s important to keep things simple and straightforward – and that’s what I’ve tried to do in this book.”
In our family, we have a range of dietary needs. I’m a vegetarian, my daughter is gluten-free, another family member is sensitive to dairy, and so putting that all in the mix, this latest book is a godsend, with every recipe carefully coded so that you can see at a glance if it’s suitable. A dish that’s quickly become a family favourite is the Indonesian Salad which is gluten free, dairy free, vegetarian, vegan and grain free – and yet, I promise you, still tastes delicious. It’s also a dish that has a small lesson in it. Did you know, for instance, that shop-bought peanuts have been heavily treated with chemicals? Making the peanut sauce with organic peanuts is a revelation in terms of taste, and it’s so easy. Egg is optional, but personally I enjoy it.
‘He that takes medicine and neglects diet wastes the skills of the physician.’ – Chinese Proverb
Purcell found her way into organic cooking and natural health because of some health issues of her own as a child. “I was often bloated as a child,” she says, “even though I was really fit and active, and my whole family – having a Lebanese mother – was naturally into healthy food. I also had a constant problem with my weight, and so I started a lot of diets, which led me into trying to work out why I could eat some foods, and not others.” Purcell quickly found out that she found meat indigestible, and that dairy was not so good for her either. “I would have been a chef then really,” she muses, “but if I’d served an apprenticeship I would have had to cut up meat, so that really counted me out!” She did end up getting her chef’s paper simply by spending so much ‘time on the job’.
After she left school Purcell decided to study fashion, but she remained fascinated with food and cooking, and gradually began to immerse herself in naturopathy, Chinese medicine and Ayuverda. As she learned more and more, she realised that her own emotional state was affected by what she ate, (and vice versa) and she began to minimize the heavier western foods – white flour, bread, rice and dairy, and replaced them with easier to digest eastern foods.
Adrian Richardson and Janella Purcell on the set of Good Chef, Bad Chef.
Diet was always a large part of her work in her private practice, so cooking classes were a natural progression which in turn led to her TV role on Channel 9’s Today Show as their resident nutritionist, and then moved onto her role as the Good Chef on Good Chef, Bad Chef. Her profile has steadily increased, as has her list of private clients, and these days, dividing her time between Sydney and her home near Byron Bay, Purcell has achieved an enviable balance between career and lifestyle, and in Super Natural Foods, her goal is to help people see how easy it can be to create easy, delicious and nutritious food. “It’s just a question of changing your thinking,” she says. “For instance, buying local, buying organic, and buying in season will all improve your diet enormously.”
If you’re wanting more information on Purcell and her approach to holistic health and wellbeing her website is full of information. https://janellapurcell.com/
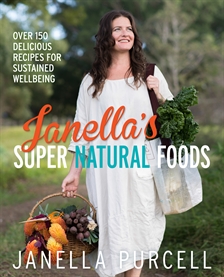
Her book: Janella’s Super Natural Foods is published by Allen & Unwin.
The post Janella’s journey appeared first on .
]]>The post Fragrant February Favourite appeared first on .
]]>This classic Thai prawn salad is one of the most refreshing things I can think of to eat on a scorching hot day. The dressing has that lovely balance of sweet, sharp and hot flavours that are used such a lot in Thai cooking, and which contrast beautifully with the briny prawns and vibrant salad greens.
I have to confess that this particular dressing is my absolute favourite, and I often double the recipe so I’ve always got some in the fridge, as even a splash adds sparkle and depth to the simplest salad. (By the way, terrific as the palm sugar is in the dressing, if you can’t get hold of it just use soft light-brown sugar instead).
I really like finishing this off with the crunchy ginger shreds, but if you don’t have the time or inclination to do them, rest assured it’s perfectly delicious just as is.
Serves 4
A little light olive oil, for cooking
About ¼ cup (45 g) very finely julienned fresh ginger
16 large cooked king prawns, peeled and de-veined, tails intact
80g roasted, salted macadamias (or cashews or red-skin peanuts), roughly chopped, to garnish
Lime dressing:
150ml freshly squeezed lime juice
150g pale brown palm sugar, pounded in a mortar and pestle or grated
6 coriander roots, chopped
Inner heart of 1 stalk lemon grass, chopped
1 kaffir lime leaf, centre vein removed and leaf finely chopped
3 teaspoons finely chopped fresh ginger
1 ½-2 tablespoons fish sauce, or more to taste

Salad:
½ medium-sized green pawpaw, halved and seeded (or use 1 very large green mango instead)
1 large Lebanese cucumber (approx. 250g) peeled and halved lengthways
100g bean shoots
2 spring onions, finely sliced on the diagonal
1 small red chilli, finely chopped
1 handful washed and dried coriander leaves
1 handful washed and dried mint leaves
A dozen or so Vietnamese mint leaves, optional
To make the lime dressing, bring the lime juice to the boil in a small saucepan over medium heat. Turn off the heat and add the palm sugar, stirring until the sugar dissolves. (If it doesn’t dissolve completely, just sit the pan over gentle heat again until it does).
In the meantime, put the coriander roots, chopped lemongrass, kaffir lime leaf and ginger in a mortar and pestle and pound them to make a rubbly paste. (If you don’t have a mortar and pestle, chop the ingredients very finely and mix them together). Stir the paste into the lime juice mixture along with the fish sauce. Taste the dressing and adjust the flavours, adding a bit more fish sauce if necessary to get a good sweet, sour, salty balance. Let everything infuse for one hour, then strain the mixture through a fine sieve into a bowl or wide-mouthed jar, pressing down firmly on the solids to extract as much flavour as possible. Cover the dressing tightly and pop it in the fridge. (If you want to make this ahead of time, it keeps well for 3-4 weeks.)

To make the salad, peel and slice the pawpaw (or mango) into fine julienne strips (it can be shredded in a food processor if you have a shredding blade) and put them in a large bowl. Use the point of a teaspoon to scoop the seeds out of the cucumber halves, then slice them into thin crescents and add them to the bowl along with the bean shoots, spring onions, chilli, coriander leaves, mint leaves, and Vietnamese mint leaves, if using. Cover the bowl tightly and put it in the fridge.
Heat a little oil (it needs to be about 8mm deep) in a small saucepan over medium heat. Once it’s hot, add the julienned ginger and cook it, stirring regularly with a fork, for about 2 minutes or until it’s crisp and golden. Remove the pan from the heat and scoop the shreds onto paper towel to drain. You can strain the leftover oil which, with its gentle ginger flavour, is lovely for stir-frying.
To serve, toss the pawpaw salad with a liberal amount of dressing so it’s well dressed. Layer the salad and prawns in individual bowls so they look really pretty, then drizzle a bit more dressing over the top. Finish off with a sprinkle of nuts and ginger shreds.
The post Fragrant February Favourite appeared first on .
]]>